
 Moving is stressful enough without the added headache—and expense—of burst pipes. For anyone relocating to or within a cold climate zone during the late fall or winter, taking immediate preventative action is non-negotiable.
At Premier Relocations, an agent for Mayflower, we know that setting up your utilities and checking your home’s infrastructure is just as important as unpacking the first box. Here is the crucial checklist you need to tackle immediately upon arrival to protect your plumbing from freezing temperatures.
Phase 1: The Immediate Arrival Checklist (Day 1)
When you first get the keys, these are the three urgent items to address before you even bring in furniture.
1. Confirm Heating is ON and Set Correctly
A frozen pipe is often caused by a temporary drop in temperature, especially when a home has been vacant.
- Set Thermostat High: Immediately turn your thermostat up to at least 65°F (18°C). Do not try to save money by setting it lower while the house is empty.
- Locate Heat Vents: Ensure all heat vents are fully open, especially those in rooms on exterior walls or in the basement.
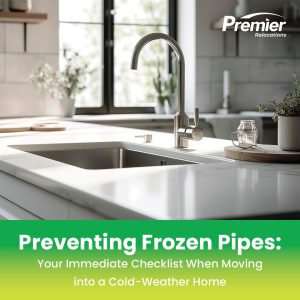
2. Open Cabinet Doors
Pipes located in cabinets—under sinks in the kitchen and bathrooms—are particularly vulnerable because they often run against exterior walls.
- Exposure is Key: Open the cabinet doors beneath all sinks. This allows the warm, ambient air from the room to circulate and reach the pipes.
3. Locate the Main Water Shut-Off Valve
In the event that a pipe does burst, knowing where this valve is will save you thousands in water damage.
- Find It Now: Typically, it’s located in the basement, near the water meter, or in a utility closet.
- Test It: Ensure the valve is not seized up and that everyone in the household knows how to quickly turn it off.
Phase 2: Vulnerability Inspection (Day 2-3)
Once the essentials are stable, spend a few hours inspecting common trouble spots that the previous owners might have overlooked.
4. Seal Air Leaks Around the Foundation
Cold air drafts are the primary cause of freezing in basements and crawl spaces.
- Target Vents and Doors: Check all basement windows, crawl space doors, and foundation vents for drafts. Use weatherstripping or temporary foam insulation to seal any obvious gaps.
- Address Garage Doors: If your garage contains any water lines (like for a utility sink), ensure the garage door seals well and consider keeping the connecting interior door ajar to let house warmth in.
5. Insulate Exposed Pipes (DIY Fix)
If you find any water pipes running along an exterior wall, inside a garage, or in an unfinished basement, they are at high risk.
- Pipe Sleeves: Purchase inexpensive foam pipe insulation sleeves (often called “pipe noodles”) from any home improvement store and slide them over the exposed sections. This simple insulation can make a massive difference.
6. Mind the Outdoor Spigots
If the previous owner didn’t properly winterize the exterior hoses and spigots, disaster is imminent.
- Disconnect Hoses: Disconnect and drain all garden hoses. Leaving them attached traps water that can freeze and crack the faucet or the pipe leading to it.
- Shut Off Supply: Locate and turn off the interior shut-off valve that feeds the exterior spigots (these valves are usually found in the basement or utility room near where the pipe exits the house).
Phase 3: During Extreme Cold Snaps
If temperatures drop severely (below 20°F / -6°C), take this temporary, proven action:
- Faucet Drip: Choose one or two cold water faucets furthest from the main water line and let them trickle slowly. The slight movement of the water helps prevent pressure buildup and delays freezing. A pencil-lead width stream is enough.
Premier Relocations is committed to getting you settled safely and efficiently. By taking these immediate steps to secure your home’s plumbing, you can relax and focus on enjoying your new space, worry-free.
If your winter move is coming up, contact Premier Relocations today for expert logistics and peace of mind!